Surface Prep and the Water Test
You know that moment when you're trying to glue something to a perfectly smooth, non-porous surface like metal or hard plastic, and the glue just... laughs in your face? It beads up like tiny water droplets on a freshly waxed car, refusing to actually stick. So frustrating, right? You hear all about "roughening the surface," but how do you really know if you've done enough to give your adhesive a fighting chance, or if you've just given your material a nice, smooth spa treatment instead of the grit it needs?
Well, folks, I'm here to tell you there's a super simple, slightly magical trick to figure this out before you waste a single drop of precious glue. I call this the Water Test, and it's basically a sneak peek into your glue's future performance.
A Quick Dip into Surface Tension (The Science-y Bit!)
Before we dive into the test, let's chat for a hot second about surface tension. Imagine the molecules in a liquid (like water or glue). On the inside of the liquid, these molecules are happy, pulling equally in all directions. But at the surface, there's nothing above them to pull on, so they huddle together, pulling inwards, creating a "skin" on the liquid. This "skin" is surface tension, and it's why water forms beads on a smooth, unwelcoming surface. When you prep a non-porous surface, you're essentially disrupting that "skin" and making the surface more inviting for liquids to spread out and bond.
The Water Test: Your Crystal Ball for Adhesion
Before we begin, this is the easiest, most accessible, and free way. There are other testing methods used by industry professionals, such as using Dyne test pens, which we can discuss in more detail if you'd like. Just leave a comment below and let us know if you're interested.
Here's how to do it the water test, no fancy equipment needed (unless you count your tap as fancy):
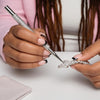
1. Prep your surface (or think you've prepped it): Grab your non-porous item, be it metal or hard plastic. Now, only to one area sand it, scuff it, abrade it, then wipe it down with alcohol. The idea is to create tiny, microscopic imperfections or to clean off any contaminants that prevent adhesion. Think of it as creating a tiny mountain range for your glue to conquer, or simply a pristine, welcoming landscape.
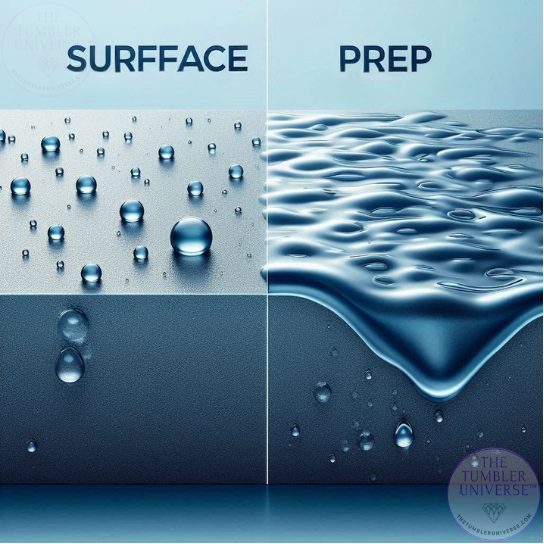
2. Unleash the H2O: Put that sucker under some running water onto both your "prepped" area and a completely untouched, smooth section of the same material.
3. Observe (and maybe giggle a little):
- On the untreated surface: The water will probably look like it's having a tiny, defiant party, forming perfect little spheres that refuse to spread. That's because the smooth, often contaminated, surface is basically saying, "Nope, not today, water (and definitely not today, glue)!"
- On the prepped surface: This is where the magic happens! The water should spread out, wetting the surface more evenly, almost like it's getting absorbed or creating a thin, consistent film. It's a beautiful sight, truly. This means you've successfully broken through that surface tension, creating a welcoming, sticky-friendly zone for your adhesive. This phenomenon is often referred to as "wetting out."
Think of it this way: if your "glue" (in this case, water) doesn't want to stick, spread, and "wet out" on the surface, your actual glue won't either. But if the water spreads like it's finally found its true home, then congratulations, my friend! You've officially prepped your non-porous surface for prime sticking action.
This little trick saves you from the heartbreak of failed projects and sticky messes. Prep is the industry standard among professionals in all fields that require surface alterations. Go forth and glue, knowing your creations will actually stay glued!

Image source: https://www.sciencedirect.com/topics/engineering/low-surface-tension
-
Posted in
glue, pro tips, surface prep

